Monday, May 15, 2006

Check out my xbox360's blog

Wednesday, December 14, 2005

Here is google satellite link to my crib out in the middle of nowhere.

Wednesday, October 26, 2005

If you look carefully, you can see an outline where the grill is. Todo still, make a frame-ish thing that will let me carpet the rear seat passthrough hole. Posted by Picasa
Semi-final step. I ordered some trunk liner carpet from partsexpress that is a much closer match to the factory trunk liner color. This cover also contains a grill which covers the sub so I can actually use my trunk normally. Posted by Picasa
Mission accomplished. I have decent low end now without sacrificing appreciable trunk room. Posted by Picasa
Here's a shot of the trunk with everything mounted and installed. Posted by Picasa

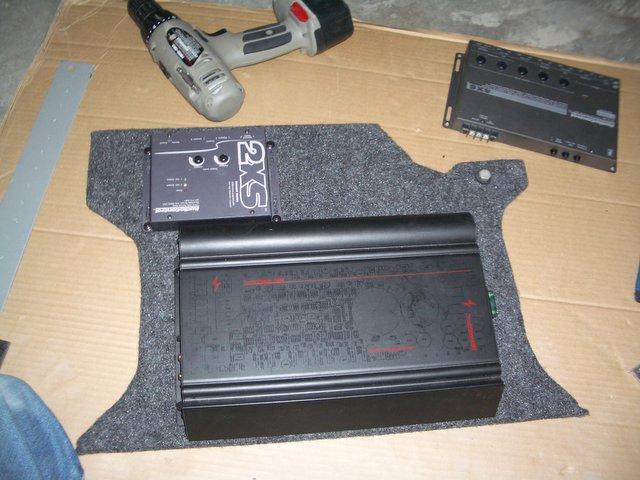
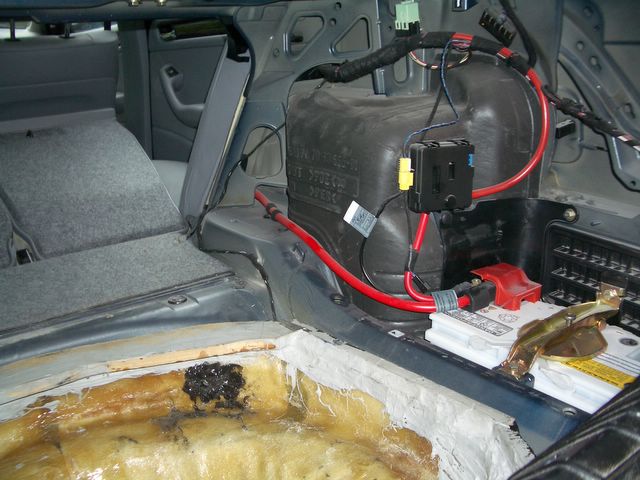
So here is an action shot of the amp & crossover mounted to the bottom of the rear deck. There was a really convenient threaded bolt hole thingy towards the rear seats, so that took care of how I was going to mount the front part of the board to the underside of the deck. I had to be a little more creative in mounting the board near the trunk lid. Posted by Picasa
Here is the board I am mounting the amplifier and crossover to. The crossover I am using at the moment is an old school Audiocontrol 2XS. The crossover that is not mounted is an Audiocontrol 4XS, which I plan to use later, when I jack around with the system some more. Posted by Picasa

Here is the carpeted enclosure which blends into the trunk pretty well. The fabric is actually a little darker than I had planned. Posted by Picasa
Sub is mounted. Time to hook up the amp. Note the use of old school PPI A404 series II amplifier. The sub is a MB Quart Reference series 10'' with dual 4ohm voice coils. The amp is running in bridged 2 channel mode, supplying the sub with 200 watts RMS per voice coil. Posted by Picasa
Lots of screws with lots of silicone on the inside. Sure the screws are not pretty, but that is what carpet is for Posted by Picasa
mounting mdf baffle board to mdf enclosure sides Posted by Picasa
Yet another test fit ...(aka measure 90 times, drill not so many times) Posted by Picasa

I was going to use some slick speaker terminals instead of the fugly speaker wire/silicone glob you see here. Problem was I didn't have a good spot to mount the terminals that wouldn't interfere one thing or another Posted by Picasa

8 guage power wire straight from battery w/ in line fuse ... Posted by Picasa
This is the enclosure bottom with liberal covering of accoustic noise dampening spray - undercoating spray with noise dampening - courtesy of O'reilly auto parts for $9 Posted by Picasa

Test fit in car
Posted by Picasa

Adding some black silicone to ensure airtight seal
Posted by Picasa

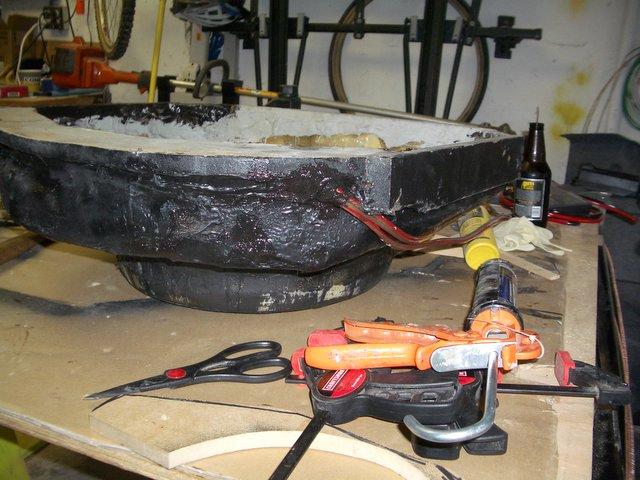
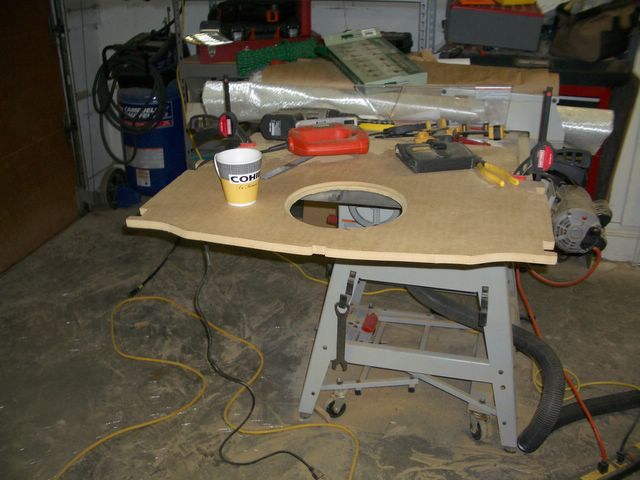
Another shot of baffle board clamped to table saw top for jig saw and router clearance.
Posted by Picasa

Cut hole for speaker in MDF baffle board. Then used router to countersink the speaker. Tried to freehand some of the routing work ...
Posted by Picasa

Added chopped matt and resin to mdf sides for sealed box. Good times, great smell!
Posted by Picasa

Sunday, October 23, 2005

Added more resin and fiberglass via chop mat. Good times.

Baffle board test fit onto mdf sides. The baffle shape is cut to conform to the trunk shape and more particularly, the cover of the spare tire well. Posted by Picasa

Adding mdf to serve as perimeter side thingys so I can mount the baffle board to the glass portion of the box. Posted by Picasa

trimmed off excess glass from sides. At this point, the mold is really ugly as I still have not added more glass and resin yet. Posted by Picasa

test fit (after some serious die-grinder action to remove any air pockets) - practice tip - DO NOT wear shorts when using a die grinder on fiberglass Posted by Picasa

mold pulled from car (time for some rework) Posted by Picasa

Saturday, October 22, 2005


more fiberglass and resin w/ 4mm filler Posted by Picasa

fiberglass and resin action Posted by Picasa

some drop cloth action (which still did not prevent the fumes) Posted by Picasa

side supports Posted by Picasa